First, start in the Products section of the management portal.

Select +Add a new product.

You will then be prompted to select your decoration method. These options are set based upon your subscription level.

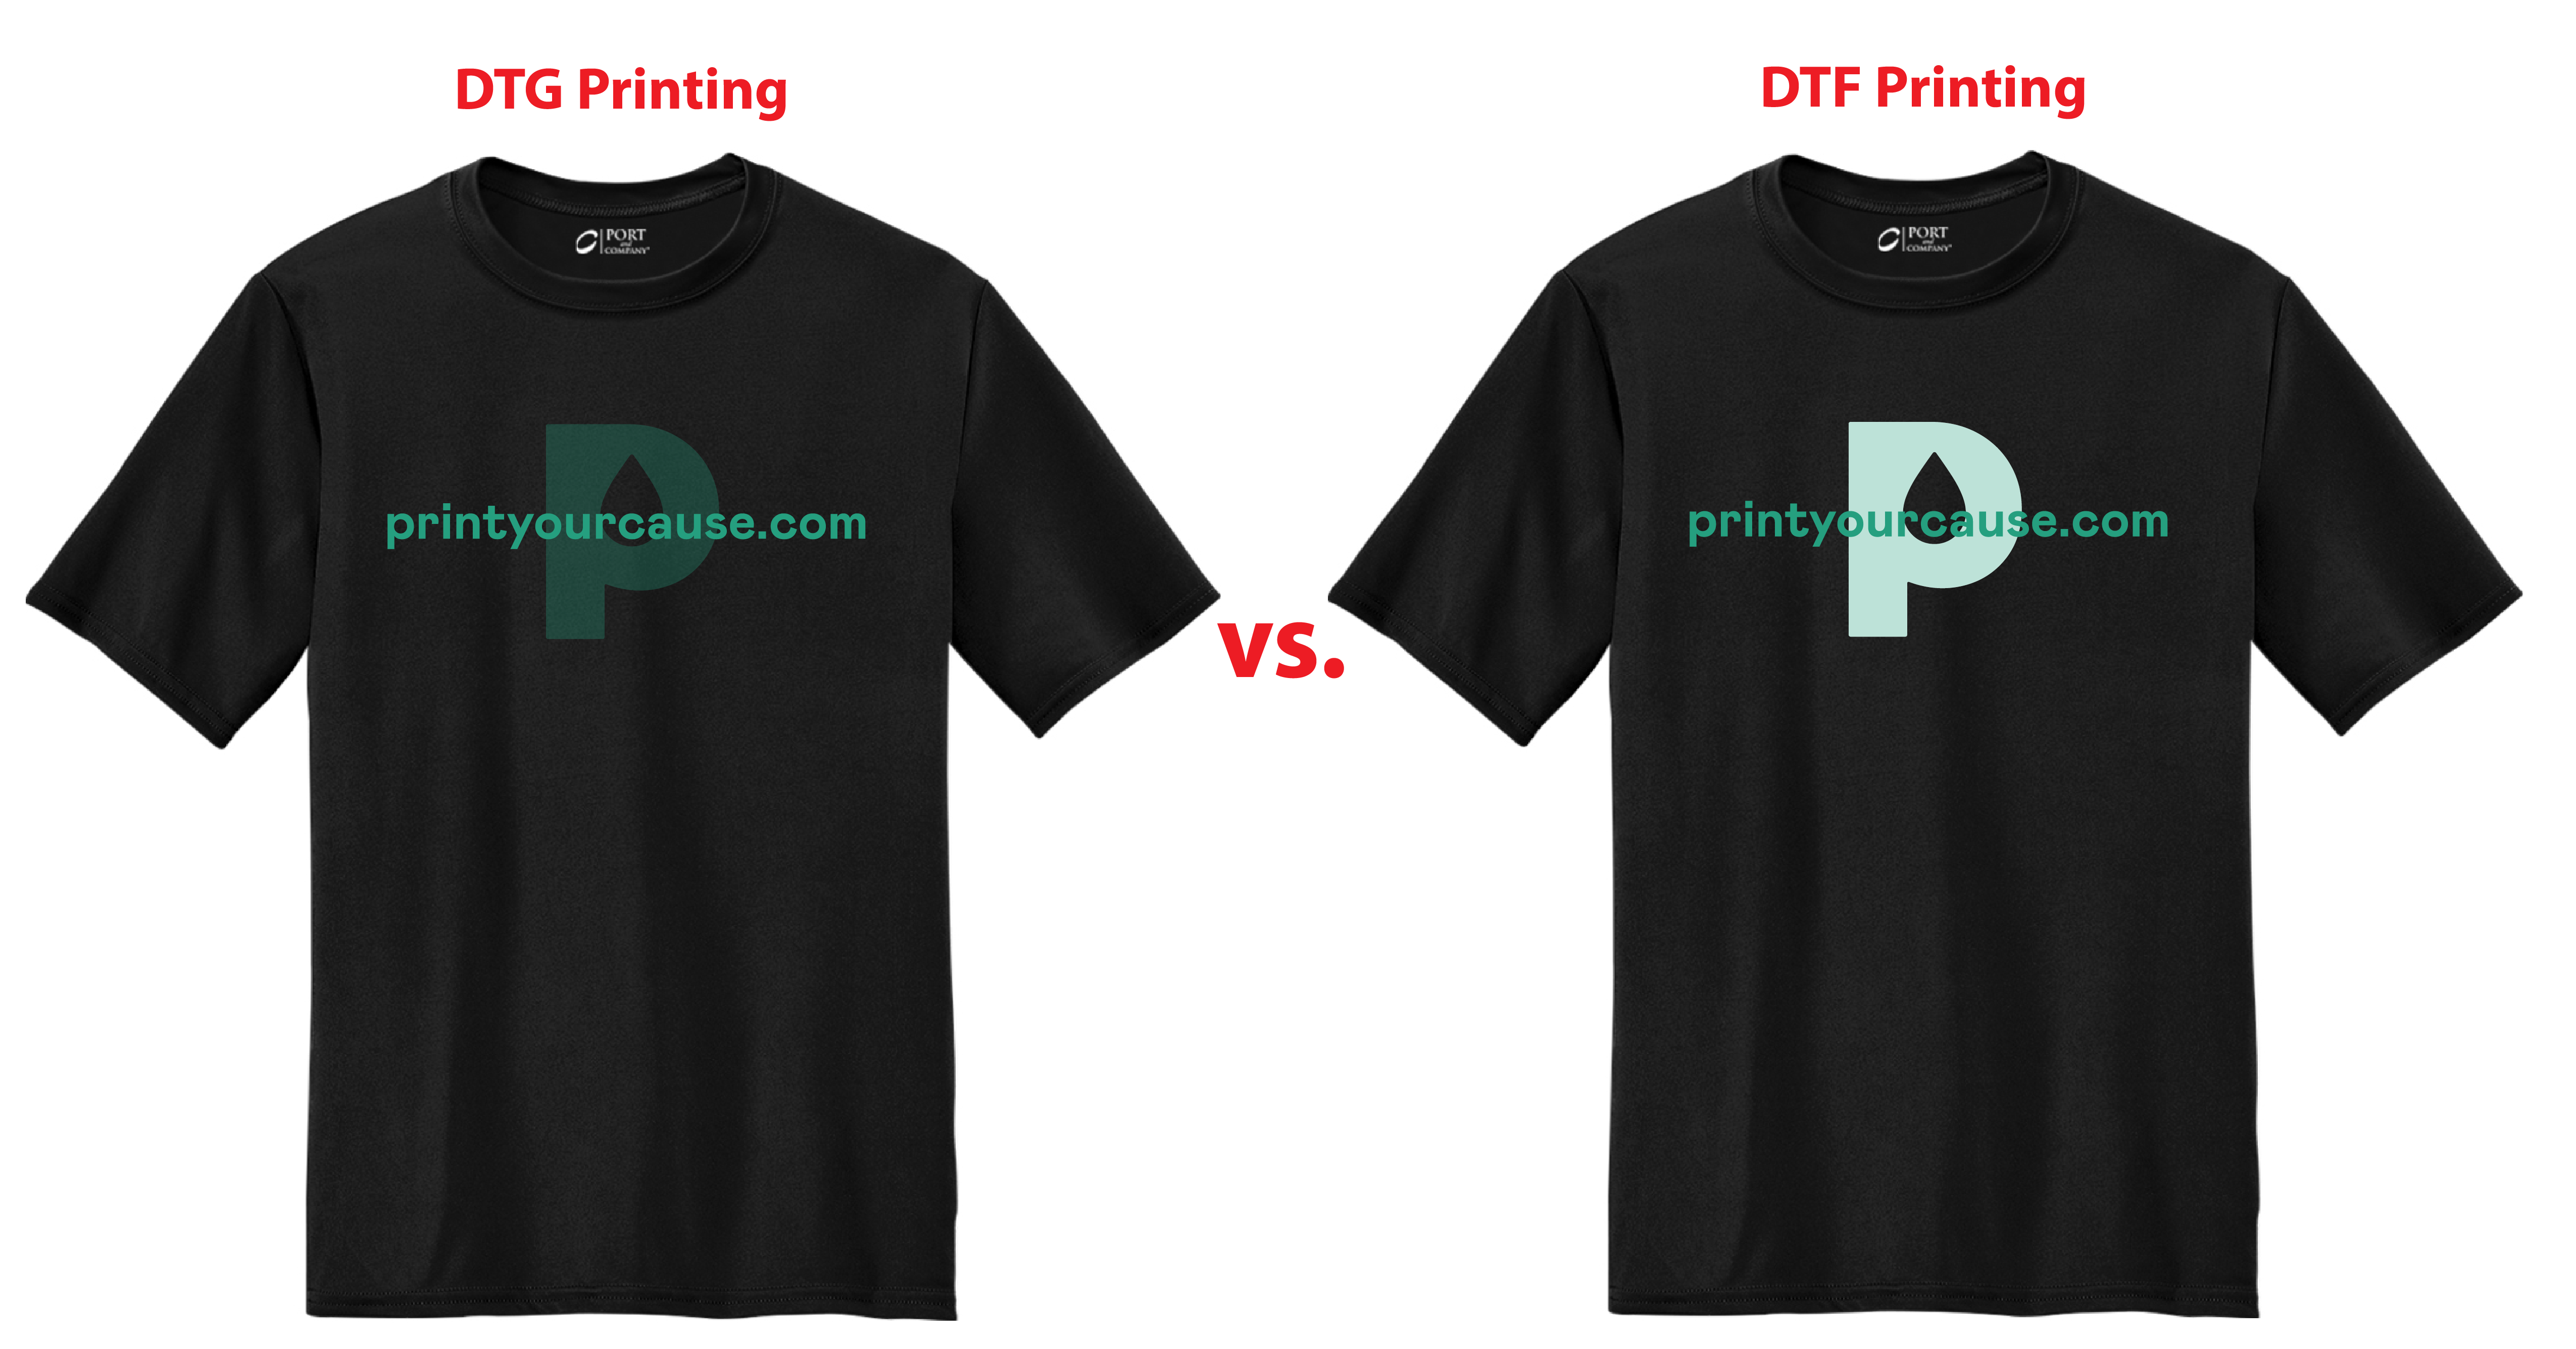
The only decoration method that will properly print artwork with transparencies, opacities, gradients, and shadows is Direct to Garment (DTG). This print method will allow the base product color to show through partially transparent graphics. DO NOT choose DTF for artwork with transparencies, opacities, gradients, or shadows.
 In this example, the "P" design element is set to an Opacity of 30% for it to appear faded into the background of the shirt. The Left, DTG Printing image is how the design is meant to print. The Right, DTF Printing image is how the design will print with the improper DTF printing method. You can see the DTF print is no longer transparent because this method requires a solid white ink base layer.
Once you select the decoration method, you will be prompted to the catalog. Here, you are able to search for new products, or quickly navigate to a specific item by searching the SKU number.
Once in the product builder, complete 4 simple steps to build your product.
1. Upload art: Once you choose artwork, this will automatically populate on your product at our recommended size and placement. However, if you'd like, you are able to resize, center, and choose different print locations within the left side panel.

Be sure your artwork is centered, and if there are small details in the design, the "Downscale Artwork" button will allow them to show clearer in the storefront.

You can click on the different print locations for that product (shown on the right side of the product builder) to add decoration to that specific print location. To do this, simply click on the print location (for example, back, left sleeve, right sleeve), then click the blue "+ Add artwork to design" button to add artwork to that print location.
2. Select the garment colors. You are able to offer your design on a variety of garment colors with a few clicks.
When you select the garment colors, a mockup will automatically generate on the right hand side. If you have art set on the back and/or sleeve(s) of the design, easily select the location to view the mockup.
These are the mockups that will auto generate to your webstore.

3. Confirm inventory: if an item is low on inventory a warning will populate. Since our inventory is pulled live from the suppliers, if something goes out of stock, the option to order will automatically be listed as "Out of Stock" from your webstore until it becomes available again.

4. Create and name product: select Save product and you will see a popup asking you to name the product. You will also enter a design name so you can use this same placement and size on other garments.

Congratulations! Your product has been made. However, the item is not ready to go live on your store just yet. Once a product has been made, you will be able to alter the product description as well as edit the design, color offering, and price.
You are able to set your profit to either a set dollar amount, percentage, or a fixed sales price on the item.
