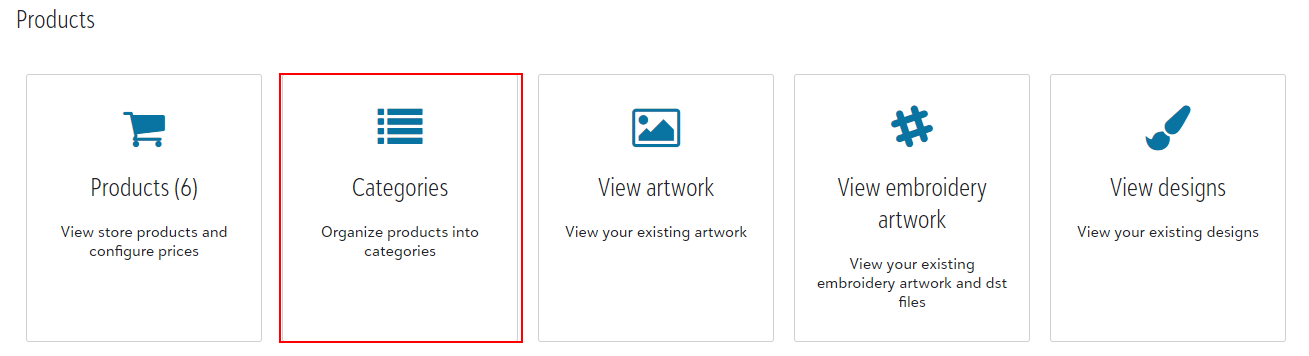
To create categories within your store, go to your Account Dashboard and choose the Categories button in the Products section.
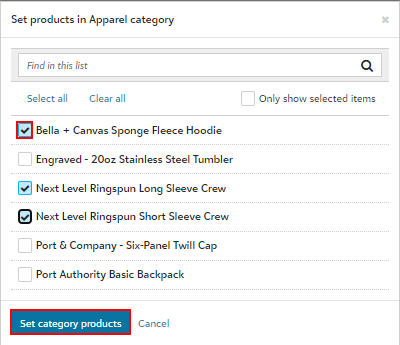
From here, you can + Add and name categories for your products. Once the category has been created, a popup will appear with all products in the store listed. Select the products for each category and Set Category Products to save.
The Tasks dropdown allows you to change the main product image, rearrange products and display colors within the category.
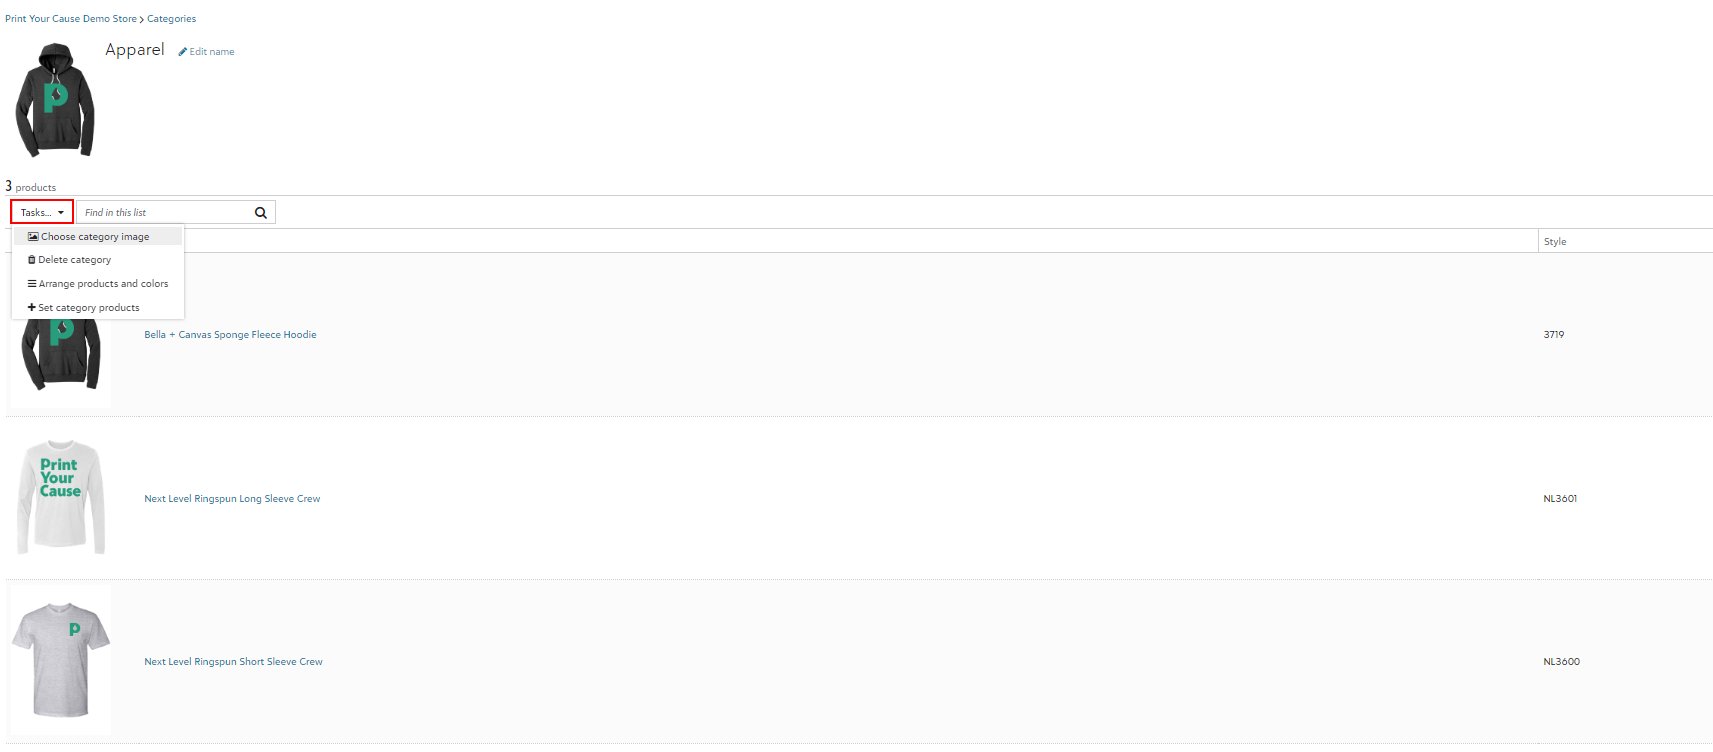
It's important to note that if the store has categories set, this is where you will do all display image editing for the storefront.
To add more categories, choose the Categories button at the top of the page and repeat the above steps. 
To rearrange categories, choose the Rearrange Categories button on the Categories page.
Any product that does not have a category set will not show in the live store. To verify all products have a category assigned, the Products button now has a quick view of products and categories.
It's helpful to create categories before building the products. Once products are saved in a categorized store, you will be prompted to choose the appropriate category for the products automatically.