1. Open Your Store Page: Log in to the management portal of your online store. Navigate to your store page.
2. Access Store Configuration: Scroll down to the Store Configuration section. Click on the "Custom fields" tile.

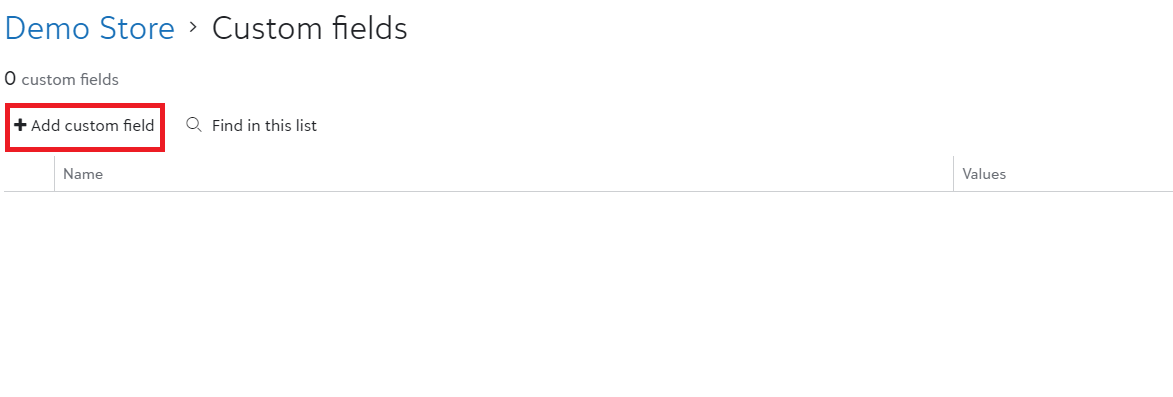
3. Add a Custom Field: Click the "+Add custom field" button near the top of the page.

3. Configure the Custom Field
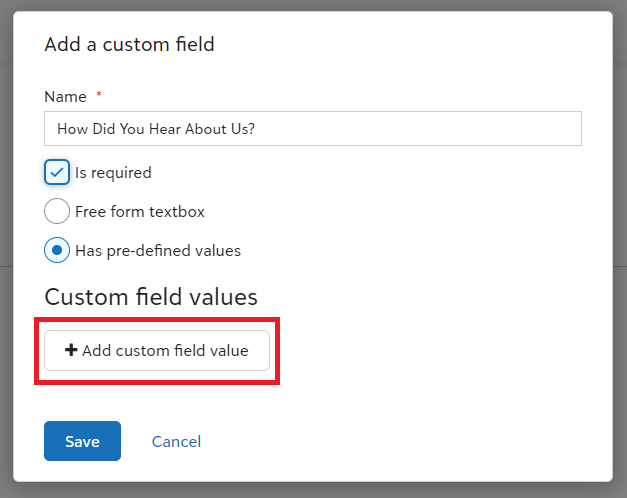
A popup will appear. In this popup:
- Enter a Name for the custom field. For example, if you want to ask customers how they heard about your store, you might enter "How Did You Hear About Us?".
- Decide if the custom field "Is required". If checked, customers will need to fill out this field before completing their purchase.
- Choose the type of field:
- Freeform Text Box: Allows customers to enter any text.
- Pre-defined Values: Provides a set list of options for customers to choose from.

If you select "Has pre-defined values", click on "+Add custom field value" to add each option.

5. Add Pre-defined Values: After clicking "+Add custom field value", a new field will appear where you can enter each predefined value.

6. Save Your Changes: Once you’ve configured your custom field and added any predefined values, save your changes to update your store’s checkout process.