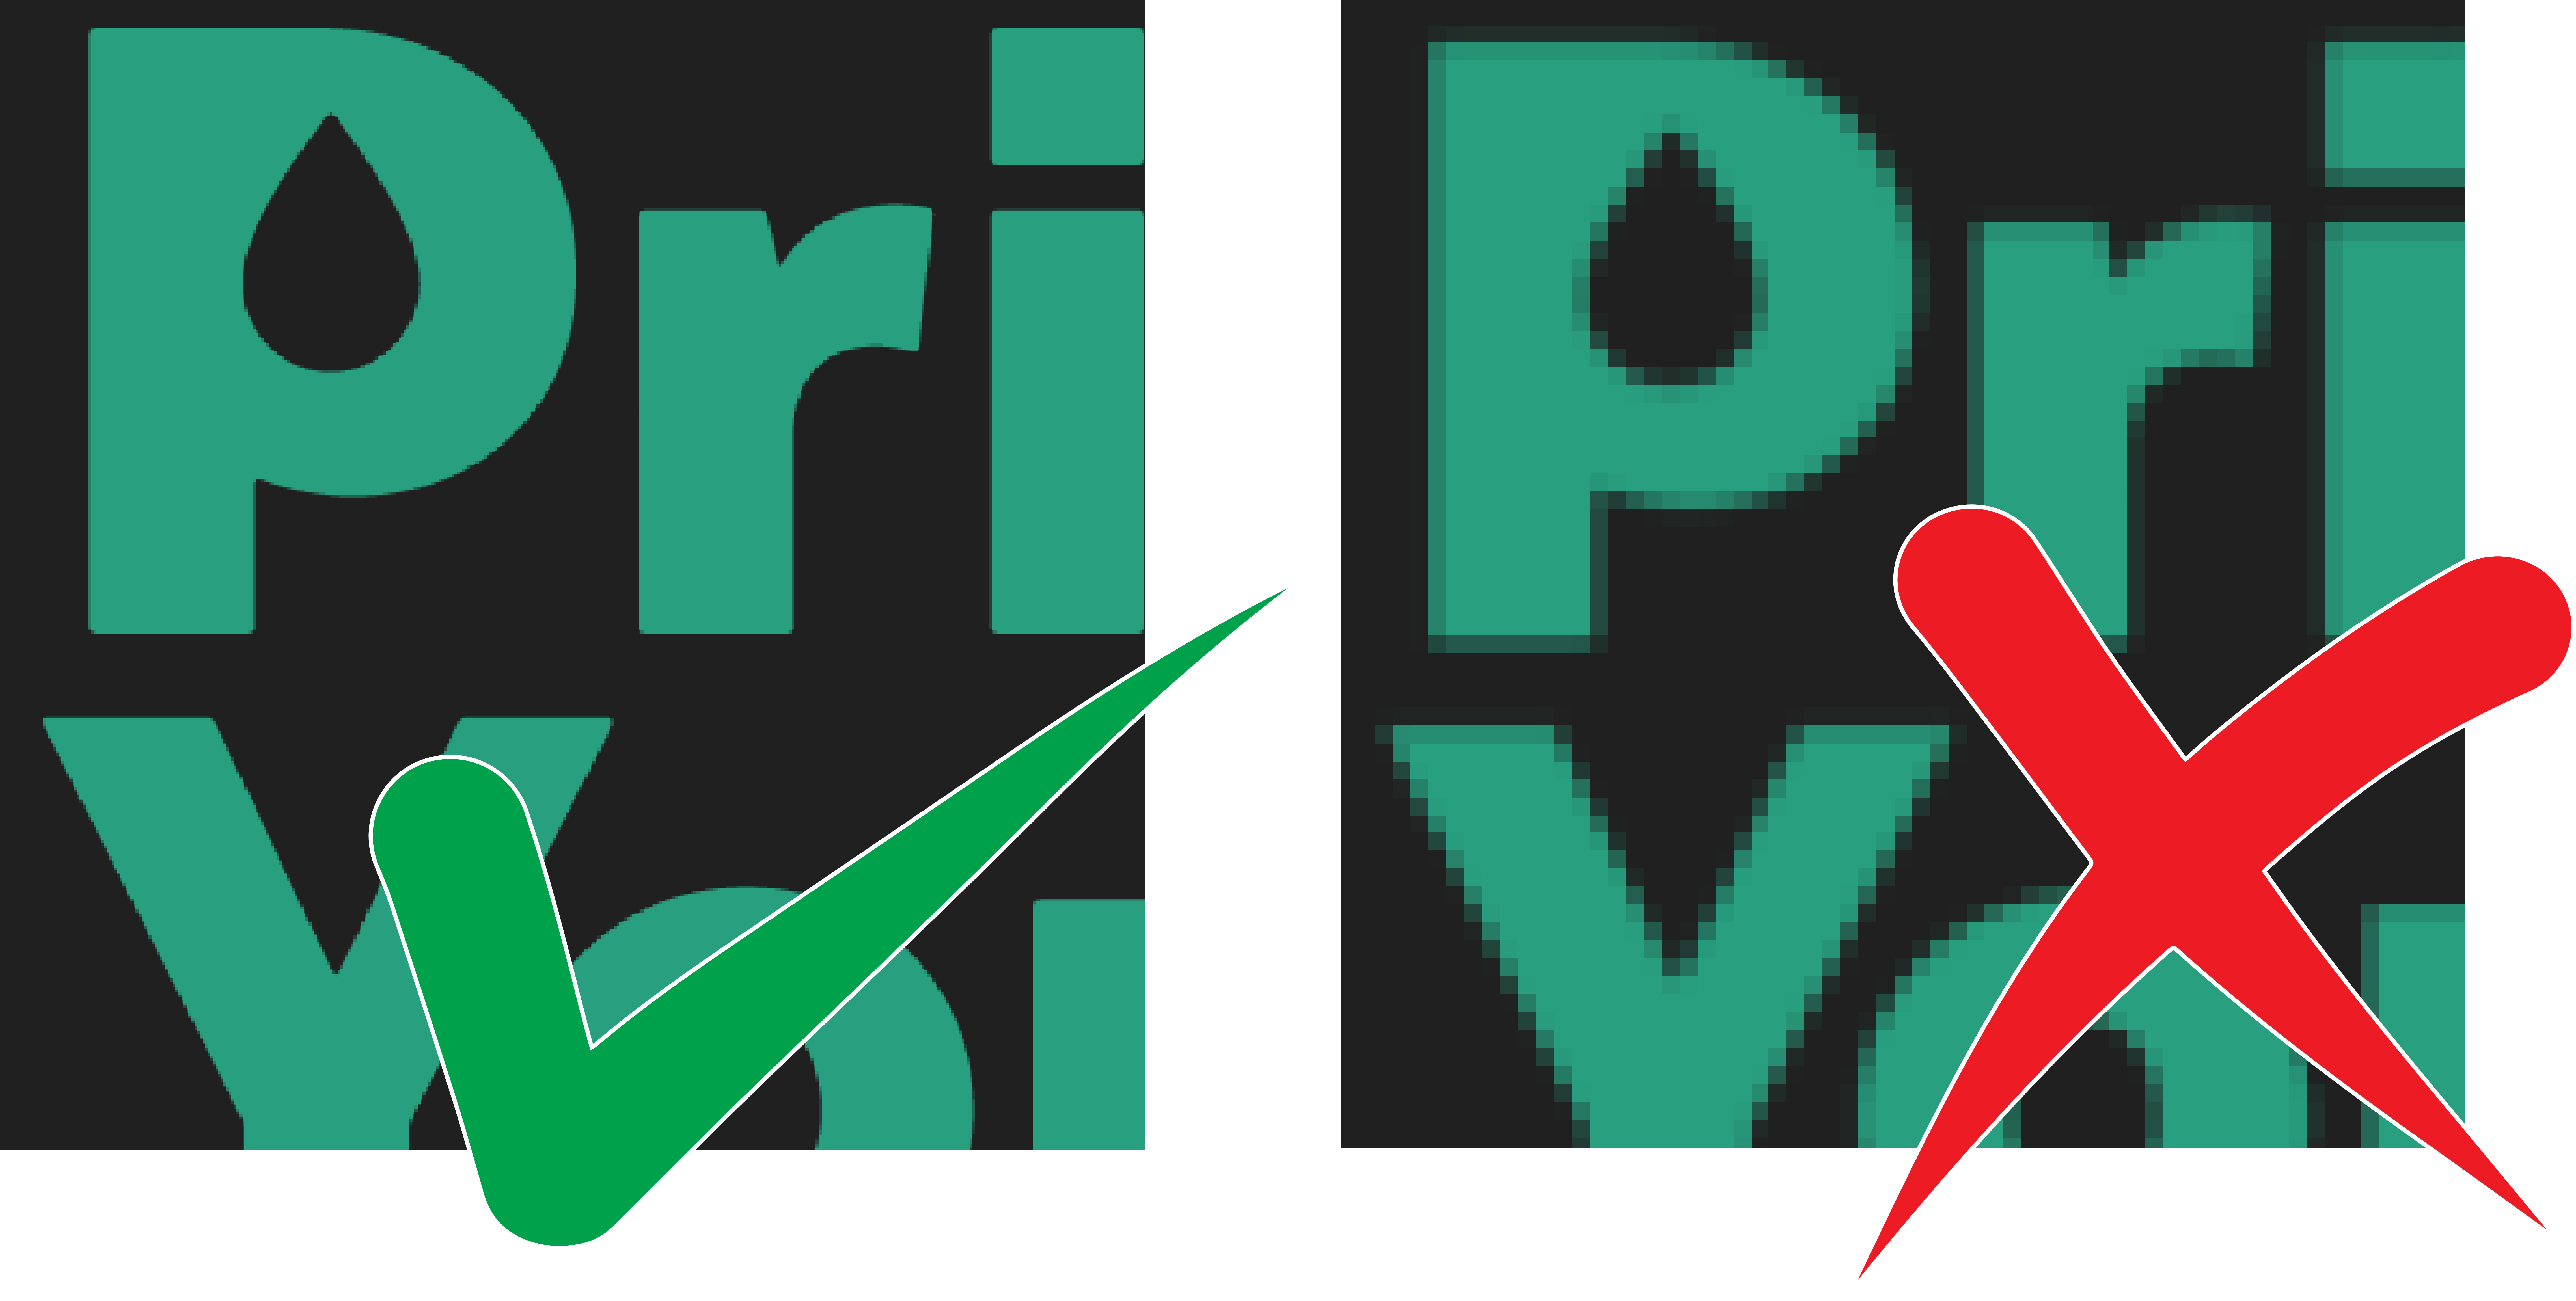
All artwork should be a minimum of 300 dpi (dots per inch). This may also be listed as "Resolution" at 300 ppi (pixels/inch) depending on your graphics program or image viewer.
Most design programs and image viewers will list the dpi or pixels/inch. You can find this under Image Size, Image Properties, File Info, etc. If you are not able to find this information, zoom in closely on your artwork to check if it appears blurry or pixelated.

Resolution Quality Guide:
0-99 dpi: Poor image quality
100-199 dpi: Low image quality
200-299 dpi: Average image quality
300+ dpi: Great image quality
Please note, the high-resolution doesn’t always equal high-quality appearance—so we recommend checking both the DPI and the visual sharpness of your artwork before submitting it for print.
All artwork should be submitted with a transparent background.
There are free programs you can download to help with this. paint.net is a great option. Steps: 1) Open your file in paint.net. 2) Select the Magic Wand Tool. 3) Click on the white background areas that you do not want to print and press Delete on your keyboard. 4) Save your new file.
When to use Artwork with Transparencies & Opacities
The only Decoration Methods that will print artwork with transparencies & opacities properly is Direct to Garment (DTG) and Sublimation. These print methods will allow the base product color to show through partially transparent graphics.
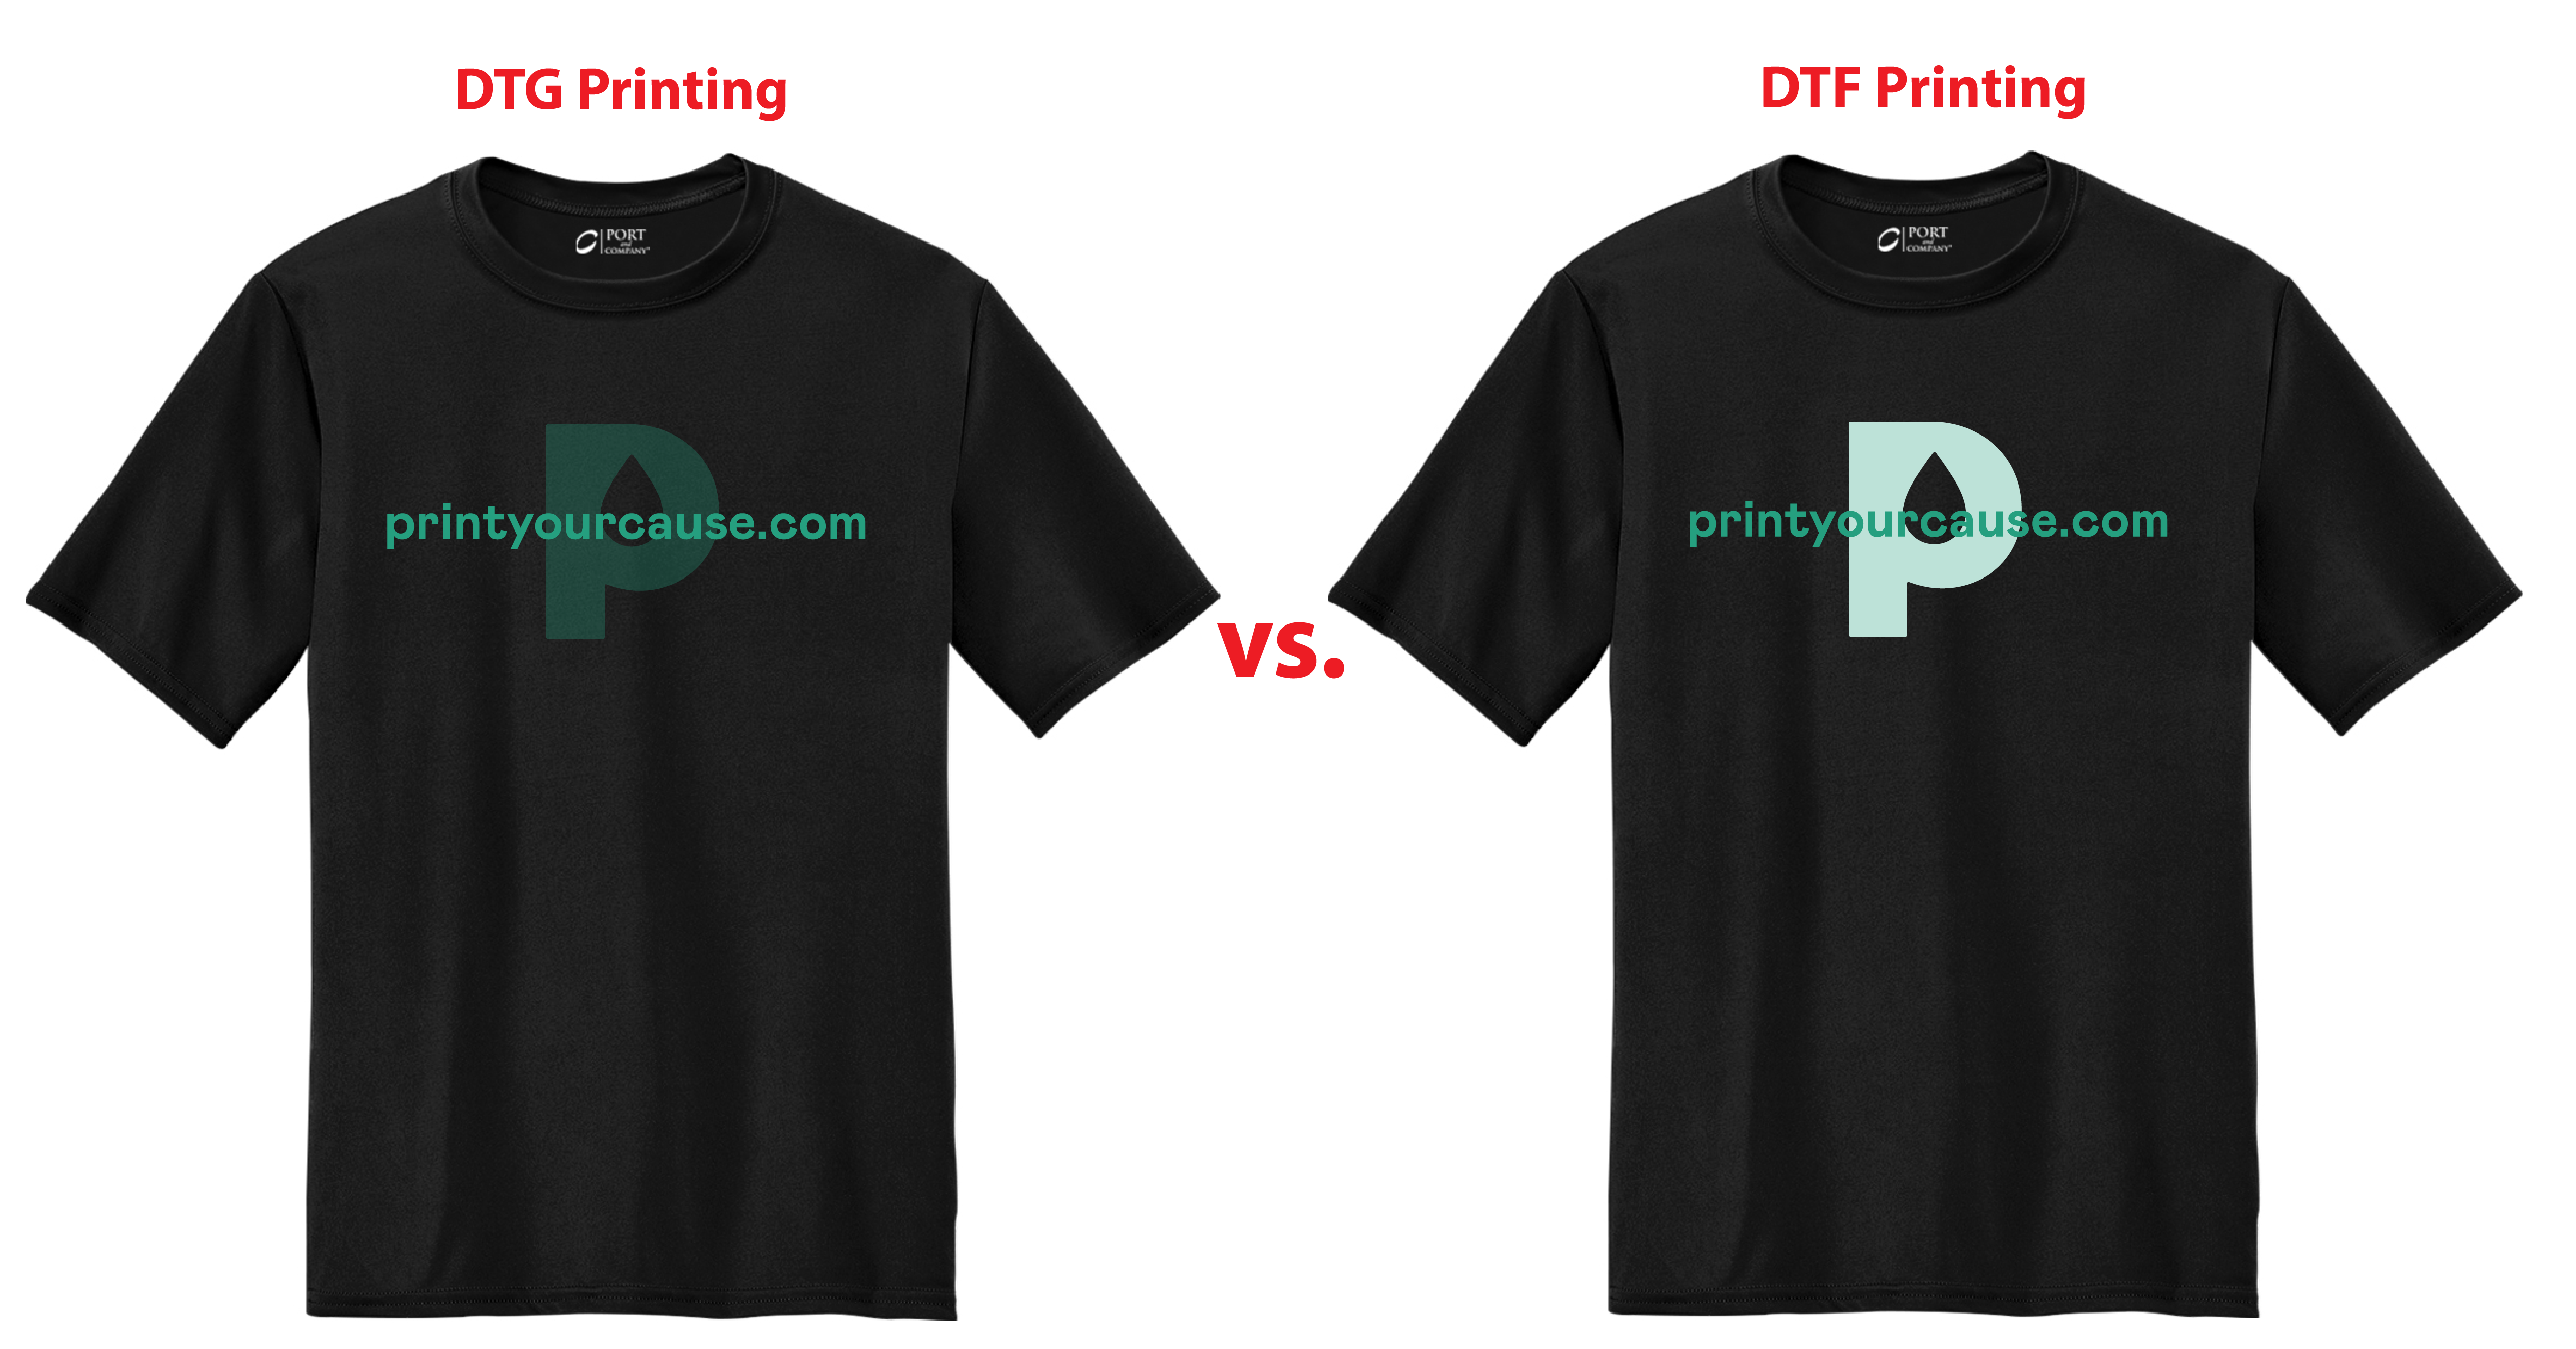
In the example below, the "P" design element is set to an Opacity of 30% for it to appear faded into the background of the shirt. The Left, DTG Printing image is how the design is meant to print. The Right, DTF Printing image is how the design will print with the improper DTF printing method. You can see the DTF print is no longer transparent because this method requires a solid white ink base layer.

Check your line weights
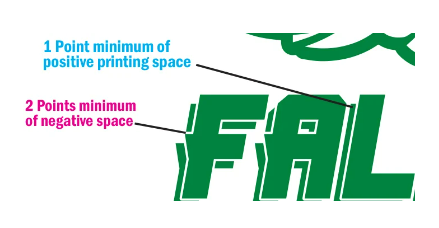
For most decoration methods, all lines need to be a minimum weight of 1 pt. All negative spaces need to be a minimum thickness equivalent to 2 pts. Details that fall under this recommended spec may not print consistently or at all. *This rule does not apply to Laser Engraving or Sublimation.

Any artwork in vector format should have all text converted to "outlines."
Make sure your fonts are not “live fonts” they should be converted to non-editable vectors. If you don't know how to do this, export your artwork to a .png file instead.
We will not review artwork uploaded through self-service unless a design audit is requested. Orders placed through the store or "Order Now" portal will be printed exactly as uploaded. Account owners assume all responsibility for any artwork flaws unless audited by our design team.